File management
File management allows you to manage external files that have been linked in Serviceware Knowledge.
To work in the file management, you must be a member of the editorial team.

| (1) | Search field with full text search and filters | (2) | Action bar with switching between file preview and list view with filter function |
| (3) | Adding files from the file explorer | (4) | Navigation pane (folder and list view) |
| (5) | File preview with details and display of usage of the selected file | (6) | Context menu for files; saving, sharing, moving or deleting a file |
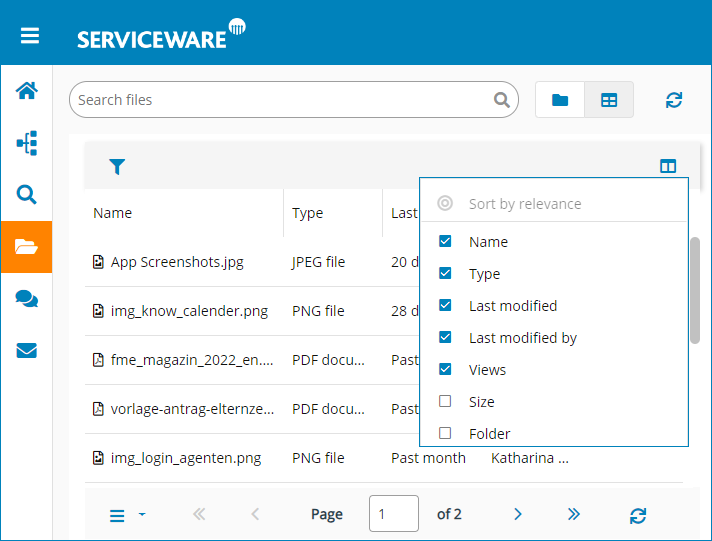
File management has a search function. The search results can be filtered and sorted according to relevance or file parameters. Several files can be selected and edited or deleted at the same time.
- Title
- File name.
- Description
- Description text.
- Folder
- Folder in file management where the file should be placed.
- User group
- Select the user group that has write permissions on the created data record from the drop-down list.
- Responsible user
- Select the responsible user from the drop-down list.
- User groups
- Select the user groups that can use the images. You can select the user groups individually from the drop-down list, selecting or deselecting all users via the check mark.
- Image options
- Select the image sizes for the figure from the drop-down list.
Creating folders
To create a new folder in file management, you have three options.
- Open file management via the navigation menu.
-
Create a folder:
- In the list view, select the folder under which you want to create a folder using the New folder context menu.
- In the list view, hover the cursor above the folder under which you want to create a folder and select the + icon.
- In the folder view, navigate to the folder where you want to create a folder and select the folder using the + icon.
- Hover the cursor over the name of the new folder and select the Edit icon.
- Specify the name of the folder in the Edit folder dialog.
- Save The settings.
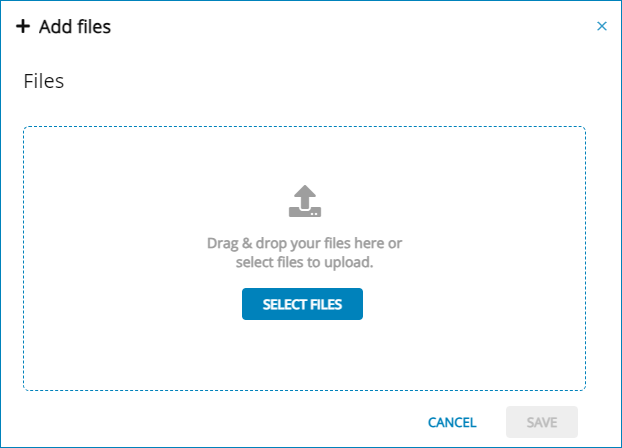
Uploading files
You have various options for uploading files.
To select the file from your computer to add it, proceed as follows:
- Open file management via the navigation menu.
-
In the context menu, select Add files.
-
For selecting the file to upload, you have two options:
- Drag and drop the desired file into the cloud window.
- Choose Select files and browse for the file using the file explorer.
- Select Select files, open the folder with the desired files using the file explorer and select several files. Then use the button Upload. Check your browser settings if the upload is not possible.
-
Describe the files using the parameters.
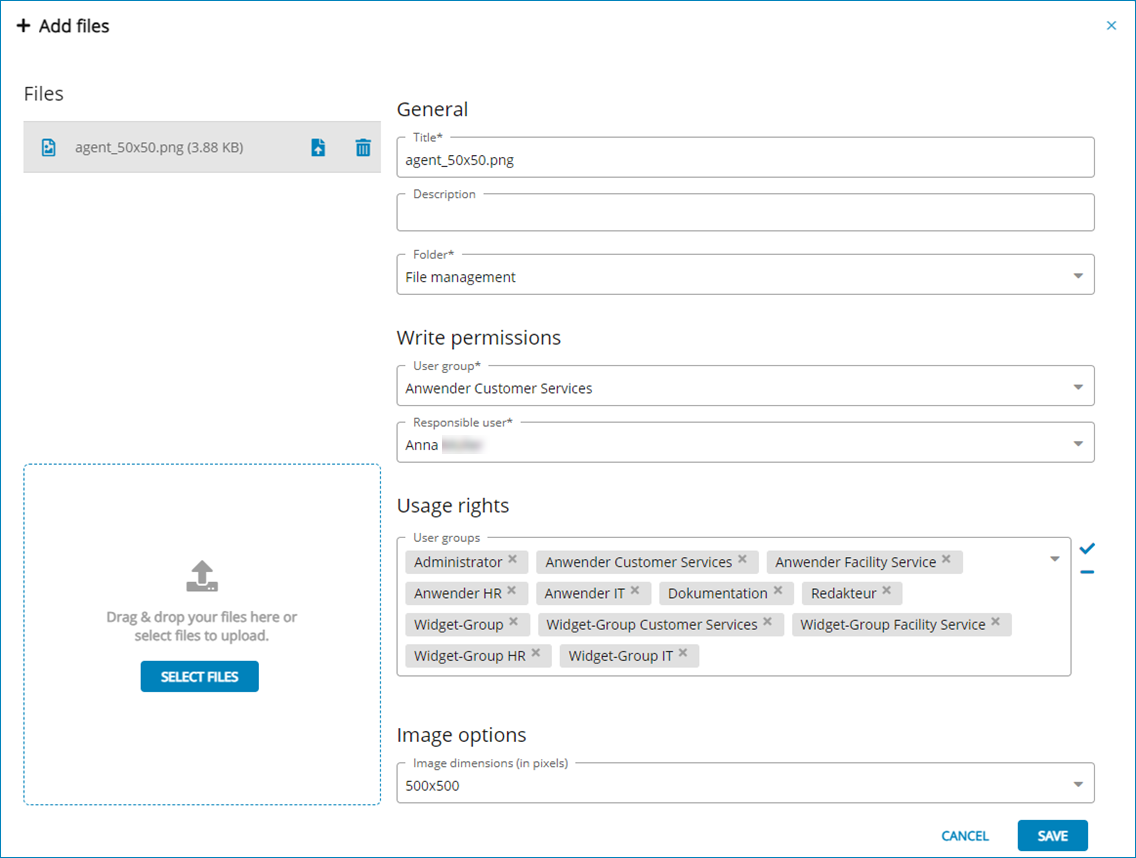
- You have the option of replacing the currently selected file via Select files.
- Save The file.
Moving a file
Proceed as follows to move a file to another folder in the file structure.
- Open file management via the navigation menu.
- Navigate to the file you want to move.
- If you want to move the file to a new folder, firstly create the new folder.
- In the detail view of the file in the context menu, select Move files.
- In the Move element dialog, select the target folder from the drop-down list.
- Confirm the selection with Move.
Deleting files
You can delete files that are no longer needed via file management.
- Open file management via the navigation menu.
- Navigate to the file you want to delete.
- Switch to the detailed view.
- Select the Usage tab.
- Check the list of usages of the file to see if you still need it.
- Open the context menu for the file and select Delete file.
- Confirm the deletion in the dialog.
Drag and drop editor
The drag and drop editor allows images that are dragged into texts with the mouse to be transferred directly to the file management.
- Open a text for editing.
-
Using the mouse, drag and drop the desired image from your file explorer into the text.
The drag and drop editor opens.
- Describe the image you want to insert and select a storage location in the Knowledge file management. Define User group and Responsible user.
- Save The data record.