Views
Views define which users see which knowledge content.
Views are created by the administration.
The Export view function allows you to export all content assigned to a view as a local backup or for local use.
Views are described by the following parameters:
- Language
- Specify the language of the view.Tip: This function is only available if the multilingualism function has been activated for you by the Customer Support.
- Name
- Enter a name for the new view.
- Description
- Enter a description for the new view.
- Color
- Select a color to highlight the view. You can choose the color in HEX, RGB and HSV format via a dialog.
- Layout
- Select a layout from the drop-down list with templates.
- User groups
- Assign the new view to user groups.
- CSS for content in this view
- Change parameters on the personal layout of your view such as colors or fonts of certain elements by entering CSS parameters. For an introduction to this topic, see https://www.w3.org/Style/CSS/.
Add view
To create a new view, proceed as follows.

- Open via the navigation menu.
- Via Add menu select Add view.
- Set the parameters for the view.
- Save the parameters for the new view.
Edit view
- Open via the navigation menu .
- Select the user view you want to edit from the list.
- Edit the parameters for the view as described above.
- Save the parameters.
Export view
To export an existing view, proceed as follows.

Tip: This function is only accessible to Knowledge administrators. For further information, please contact Customer Support.
- Open via the navigation menu .
- Select the user view you want to export from the list.
- In the action bar, select the drop-down list Export.
-
Select the export format:
- XML (tree structure and texts); a file with all the information is output in .xml format.
- CSV (tree structure); a table with the tree structure is exported. It contains information on the editors responsible for branches and texts.
- MS-Word (text); the contents of all texts are output in a Word file.
- HTML (tree and search); all content is exported as a web page with search function.
The download of the respective export file is started automatically.
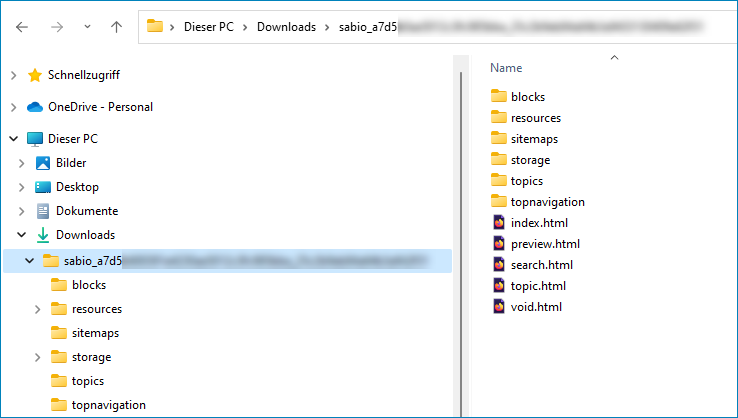
Open exported HTML view
Use individual texts of the exported view on your PC or the entire content on a web server.
-
Unzip the downloaded .zip file with the contents of the view on your computer.
A folder structure with all the contents of the exported view is unpacked.
-
You have two options of using the content:
- Use individual files by selecting a file in the blocks folder and opening it in your web browser.
- Use the entire view with search function by uploading the unpacked folder structure to a web server. You can then open the website in your browser by entering this address: index.html.
Delete view
To delete an existing view, proceed as follows.
Tip: You cannot delete a view if has content assigned to it that is not assigned to any other view.
- Remove the view from all 1st level branches. Level.
- If the view is the only view assigned to a branch or text, assign a different view instead.
- Open via the navigation menu .
- Select the view you want to delete from the content list.
- Select the Delete function in the action bar.
-
If content that is not linked to any other view is assigned to your view, you will receive an error message.
- Check which content is assigned to the view you want to delete.
- Link the content to another view if you want to use it again.
- Run the Delete action once again.
- Depending on the configuration of your system, you may have to confirm the deletion process in a dialog.